In this guide, we'll walk you through how to use the Track Invoicing feature, so you can turn your billable time into client-ready invoices and close the gap between tracking and billing without switching tools.
🌟 This feature is included in the STARTER Plan
In this guide:
- How to turn on the Invoicing feature
- Invoicing feature settings
- Create your first invoice
- Issue, edit, delete and download invoices
- Where to find your client invoices
How to turn on the Invoicing feature
To get started with the Invoicing feature, go to Settings inside the Track workspace. Look for "Invoicing" and turn the feature on.
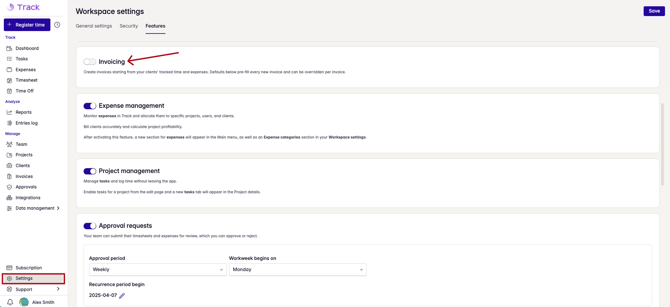
Turning on the feature activates it for the entire team.
Invoicing feature settings
In the Invoicing settings, you can set up the following global details that will be stamped on any invoice you create:
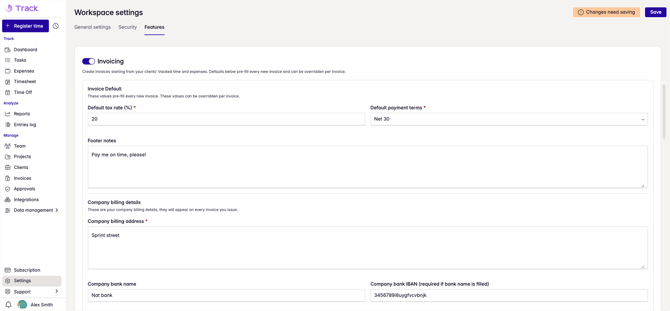
- Your company's billing details: company address, bank name, and International Bank Account Number (IBAN)
- Default tax rate: enter the rate that applies to you
- Default payment terms: choose from "Due on receipt" or Net 15, 30, 45, 60
- Invoice numbering: set up a starting prefix and a starting number. You can also decide how invoice numbering should proceed (continuous, or reset yearly)
- Optional footer notes: add any additional information you'd like to appear on your invoices

Invoicing permissions
Like other features in Track, Owners can decide who is allowed to issue invoices. By default, Owners and Admins are pre-selected, but you can also add PMs.
.png?width=670&height=47&name=invocing%20permissions%20(1).png)
When enabled, PMs can create, issue, mark as paid, and void invoices, but only for clients of the projects they manage. PMs cannot access invoices for other clients.
Create your first invoice
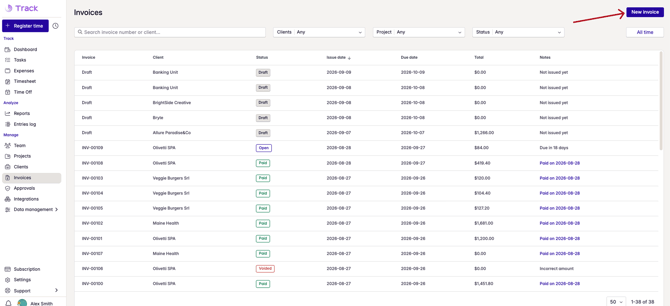
Once the feature is activated, you'll see a new Invoices menu item on the left:
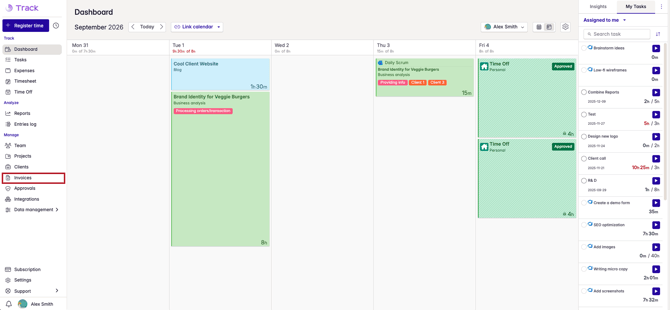
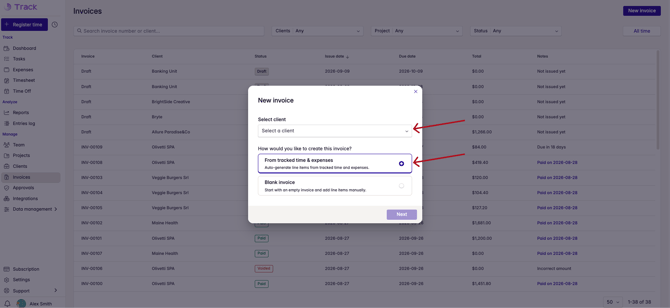
Inside the section, click New invoice and select the client you want to bill. Any unbilled time remaining for that client will be pulled in automatically.
You can then choose to create an invoice from the unbilled Time & Material entries, which will be pre-selected, or start from scratch with a blank invoice:
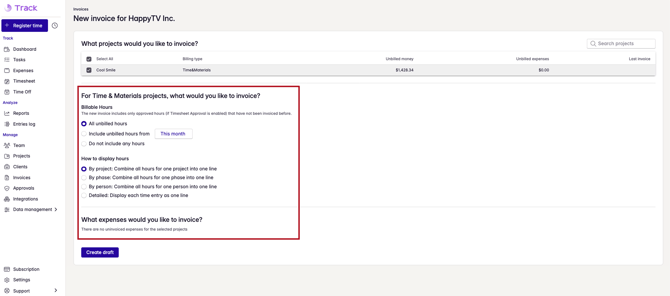
If you start from the Time&Material entries:
Every billable project for that client will be shown with its unbilled total, already selected for you.
In the options below the projects, you can choose whether to include all unbilled entries or just those from a specific timeframe. Next, decide how you want the hours to be displayed on the invoice:
- group by project
- group by project + phase
- group by project + person
- or display every entry as a single line
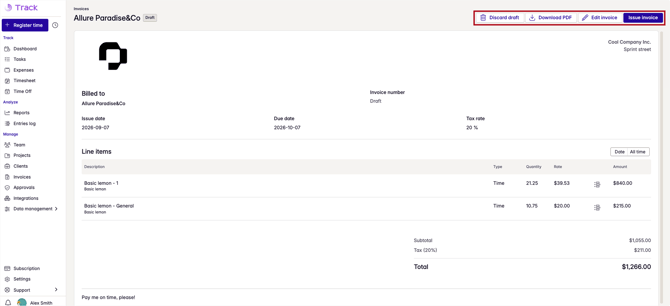
When you confirm, you'll get an invoice with line items linked back to the time entries, showing the quantity, rate, and amount per line, along with the subtotal, the tax rate you configured in settings, and the total at the bottom. You can make any edits necessary, and when you're done, simply click Issue invoice.
If you start from a Blank invoice
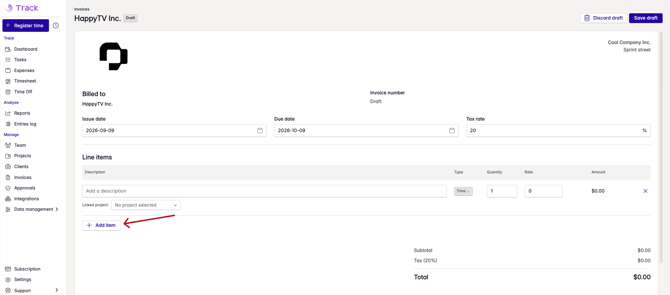
Add line items to the invoice manually. To add a new line, click the "+ Add item" button. When you're done, save the draft.
Issue, mark as paid, void, and download invoices
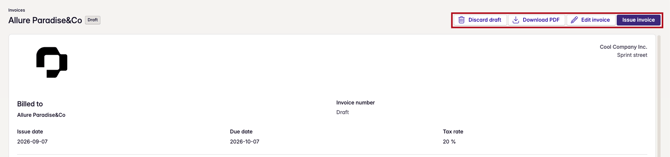
Once your draft invoice is finalized, click the Issue invoice button. This is when the invoice number is assigned, following the numbering settings you configured.
At the top right of the invoice, you'll find a row of buttons where you can mark the invoice as paid, edit the invoice, or download it as a PDF.
Once the client has paid the amount due, click on the invoice to change its status to "Paid":
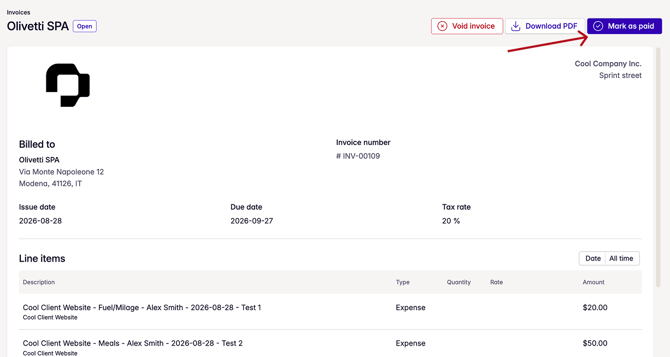
An issued invoice can also be voided:

Where to find your client invoices
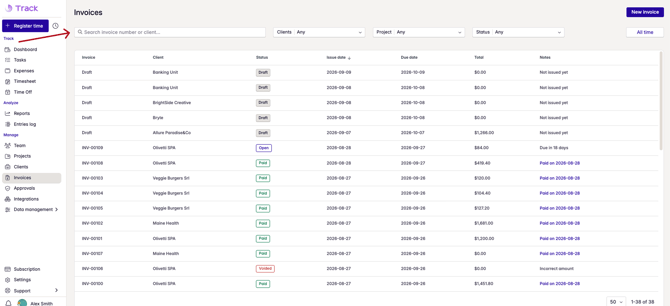
The Invoices section gives you an overview of all invoices, their status, and the date they were issued. Use the search bar at the top to filter by client, project, or status. Click any invoice to see its details.
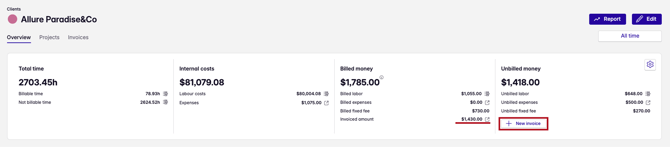
On the Clients page, open a client's details. You'll see a shortcut to all invoices created for that client under "Invoiced amount," as well as a button to create a new invoice on the spot.
Similarly, on the Project page, open an individual project to find the invoiced amount and a shortcut to view all issued invoices.
.png?width=670&height=147&name=new%20invoice%20(1).png)
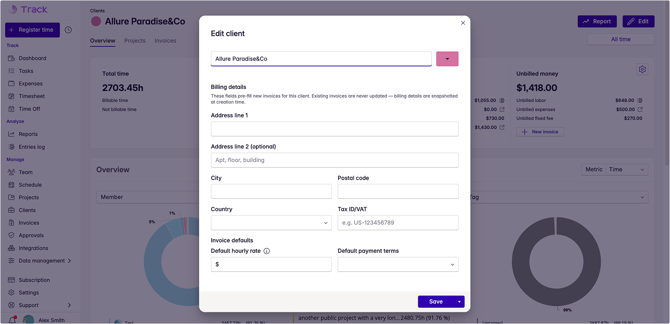
For each client, click Edit client to set that client’s default invoicing details.