In Timeneye, you can mark your hours as billed or billable in several ways. This helps you track your work, create accurate invoices, bill clients correctly, and know if your work is profitable.
🌟 Time&Material projects are included in the STARTER Plan and up
Time&Material projects are considered billable in Timeneye: this means that you set hourly rates, mark the individual entries as billable/billed/unbilled/not billable, and keep track of your earnings. A Time&Material project can also have a monetary budget, and you can also include project Expenses in the budget calculations.
(Working with Fixed fee projects? Check out this guide instead)
Understanding billing in Timeneye
-
Billable includes both billed and unbilled time within a billable project. It's the total potential revenue for a project;
-
Billed means you've already received a payment for that work;
-
Unbilled means you have yet to bill it to the client;
-
Non-billable is a specific activity that you decide to exclude from the billable count (see more at the end of this guide).
How to change the billable status of time entries (Billable, Unbilled/Billed, Non-billable)
Firstly, you can do it from the Entries list, which you can open by clicking the Entries log icon on the sidebar.
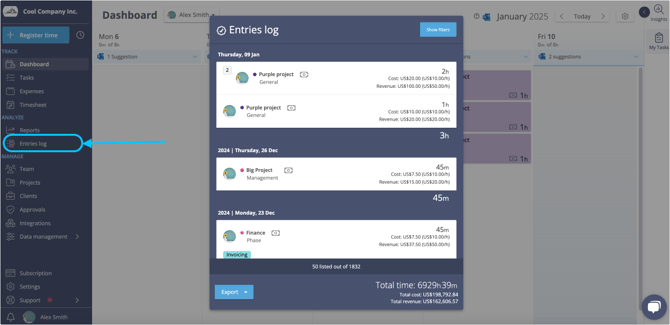
In the Entries list, click on the Show Filters button, and you'll be able to sort out your entries according to the filters until you get to the entries you need.
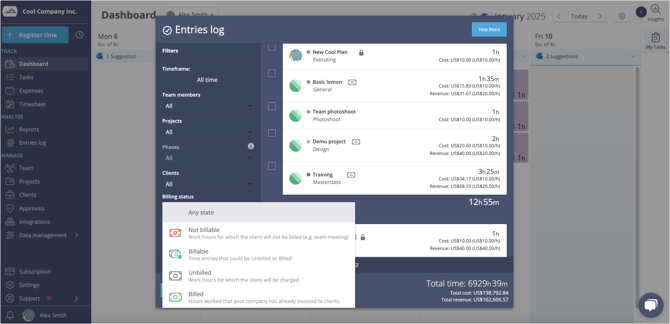
-
Select the Filters. You should see the checkbox appear next to the entries;
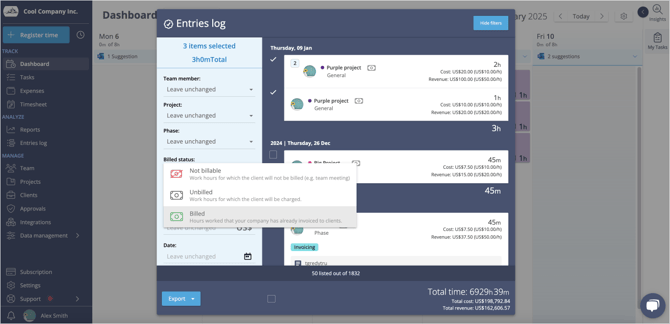
-
Start selecting the entries: the light blue section appears on the left. Here you can select the Billed Status of your entry;
-
When you're done, click on Update entries.
Similarly, you can mark the entries as Billed/Unbilled/not billable from the Project Status page:
-
In the Projects section of the workspace;
-
Click the project's name and open the Project status page;
-
In the top boxes, look for the shortcuts to open the Entries lists next to the Billable time counter:
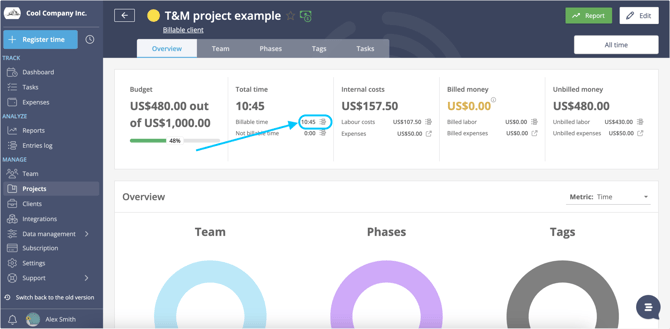
From there, you can open the Entries log, select the billable entries you need, and change their status.
Adding a Monetary Budget to a billable project
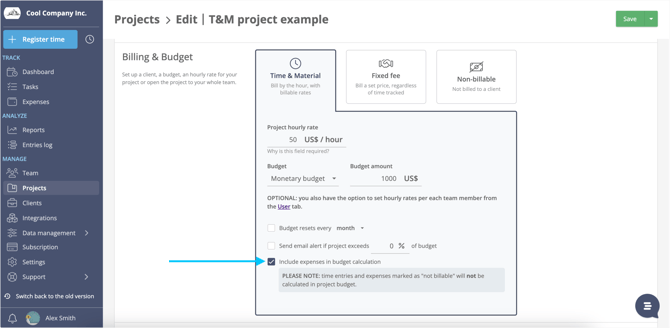
In Timeneye, you can set a Time or Monetary budget for all your projects. For Time&Material projects with a Monetary budget, the progress bar shows the budget completion compared to the actual revenue (in other words: the total billable amount)
-png.png?width=670&height=329&name=billed%20time%20status%202024%20(1)-png.png)
Billing project Expenses
In a Time&Material project, you'll also want to include your Expenses in your final calculations. This can be done easily by checking the "Include expenses" option:
To allow you the flexibility to decide what exactly to bill your client, when you add an expense and link it to your billable project you can decide if the expense should be billable or not:
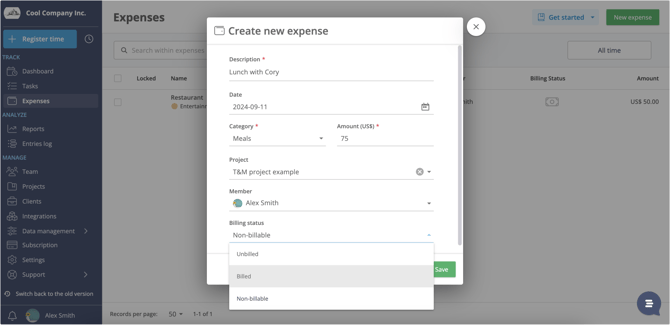
All the billed expenses will be subtracted from the Monetary budget total. Non-billable expenses won't be included in the Monetary budgets.
Non-Billable entries in a Billable project
Are there any activities in your billable project that you'd rather leave out of your totals than put in your client's invoice?
From the same view, you can mark an entry as non-billable even if it belongs to a billable project.
Billable and Non-Billable Phases and Tags
🌟 This feature is included in the Premium plans and up
On the Free or Starter plan? Upgrade to unlock this feature!
Account owners and admins can mark specific phases and tags as non-billable at a global level. Once enabled, all time entries linked to those phases or tags are automatically categorized: no need to update them one by one. This saves team leads significant time and ensures billable and non-billable hours are always accurately tracked.
How to set up billability management
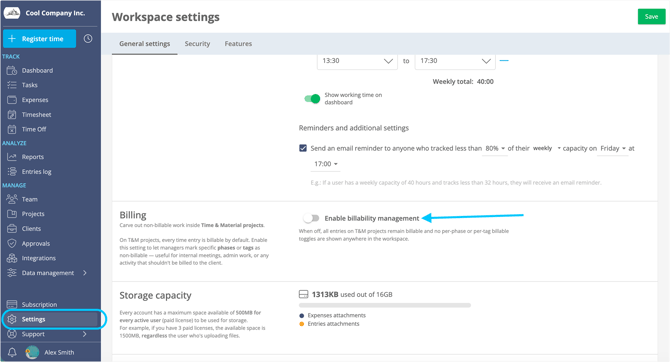
- If you’re an Owner, go to the Settings section of your workspace.
- Under General Settings, find the Billing section and turn on Enable billability management.
-
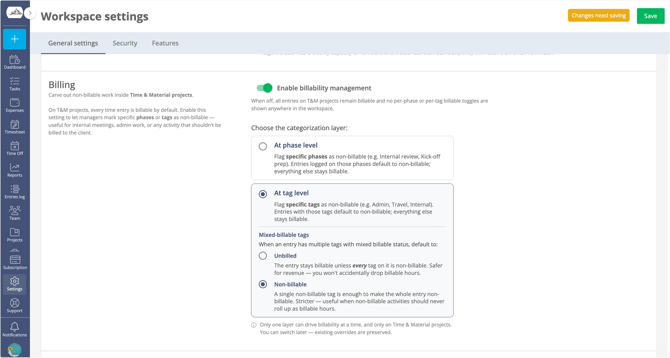
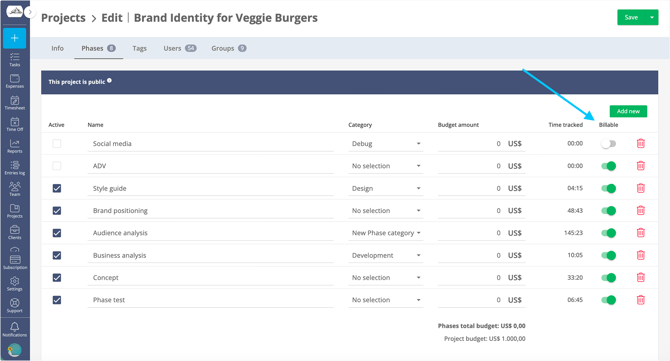
- Phase level: Mark specific phases as non-billable. Entries logged in those phases will default to non-billable; all other entries remain billable.

- Tag level: Mark specific tags as non-billable. Entries with those tags will default to non-billable; all others remain billable. For entries with multiple tags, you can also define how conflicts are handled (see the Managing non-billable tags section below).
💡 Examples of non-billable phases: Internal review, Kick-off prep
💡 Examples of non-billable tags: Admin, Travel, Internal activities
These are just a few ideas for you. Adapt these to fit your team's needs and workflows.
Managing non-billable phases
When billability management is enabled, a Billable toggle will appear in the Phase Categories section.
Go to Data Management> Phase Categories to configure which phases are billable and which are not.
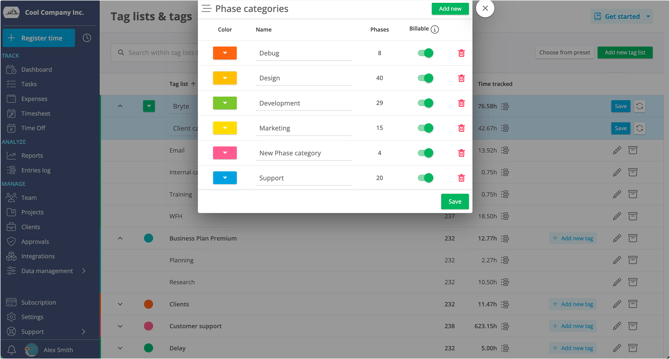
Changing the billable status of a phase only affects future entries. Existing entries will remain unchanged.
You can update your selections at any time. You can also adjust the billability of individual phases directly from the Project edit mode of each project.
Managing non-billable tags
Tag-level billability gives you fine-grained control over how entries are classified — including complex cases where an entry carries multiple tags with different billability statuses. Setting this up carefully ensures your invoices always reflect reality and no billable hours slip through the cracks.
When you select Tag level, you'll need to decide how to handle entries with mixed tags:
- Billable unless all tags are non-billable: The entry stays billable unless every tag on it is non-billable. This is the safer option for protecting revenue — a single non-billable tag won't cause you to lose billable hours.
- Non-billable if any tag is non-billable: A single non-billable tag is enough to make the entire entry non-billable. Use this for activity types that should never appear on an invoice, regardless of other tags.
Once configured, a Billable column will appear in Data Management> Tags. To make changes, click the Edit button and adjust your tag list.
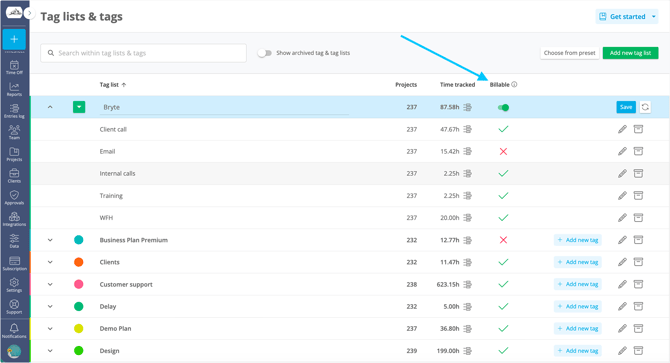
Changing the billable status of a tag only affects future entries. Existing entries will remain unchanged.
Here is a full tutorial on Monetary Budgets:
Resources:
If you’re curious to read more about the topics covered in this article, we recommend looking at the resources below.