Start - Set up your workspace
Learn how to set up your workspace based on your company's structure and business goals.
Once you have completed the signup process, you will land in our calendar-style Dashboard. If you haven’t done it yet, we recommend reading our Quickstart Guide to familiarize yourself with all its parts.
Creating a project is compulsory to start tracking time in Timeneye. You can create a new project from the Register Time window or the Projects section in the sidebar menu.
You can start with 2 or 3 projects just to get the pulse of how it works.
If you need guidance in this process, check out our support page about Creating Projects or take the in-app tour of the Projects section.
Important: before inviting people to join your workspace, you need to create at least one project with one phase where they can track time.
Please ensure you associate a project with each user when you invite them to join your workspace.
Some of your early adopters might help you create more projects, but it depends on the role and permission level you attribute when you invite them (more on this later). For now, keep in mind that users with the permission role of Admin or Owner can create projects. Group Managers can create projects too, but only for the groups they are part of.
Otherwise, you could Import Projects and Phases in a CVS file.
How to set up your workspace based on your company's needs
In Timeneye, when you create a project, you must create a Phase too. Phases help you break down a big project into smaller, more manageable chunks.
Phases can be the actual phases of the project or, for example, the single activities you perform for that client within the project.
The main benefit of dividing your projects into phases is that it will help you categorize your time and see how long each phase takes in terms of time and resources.
Examples of how to set up the phases:
-
A project called “Marketing” can have phases like “Social Media,” “Email Marketing,” or “Market Research”;
-
If you make an app, the phases can be “App 1.0”, “2.0”, and so on;
-
Not sure what phases to use? Select the option “Copy from…” and use our templates!
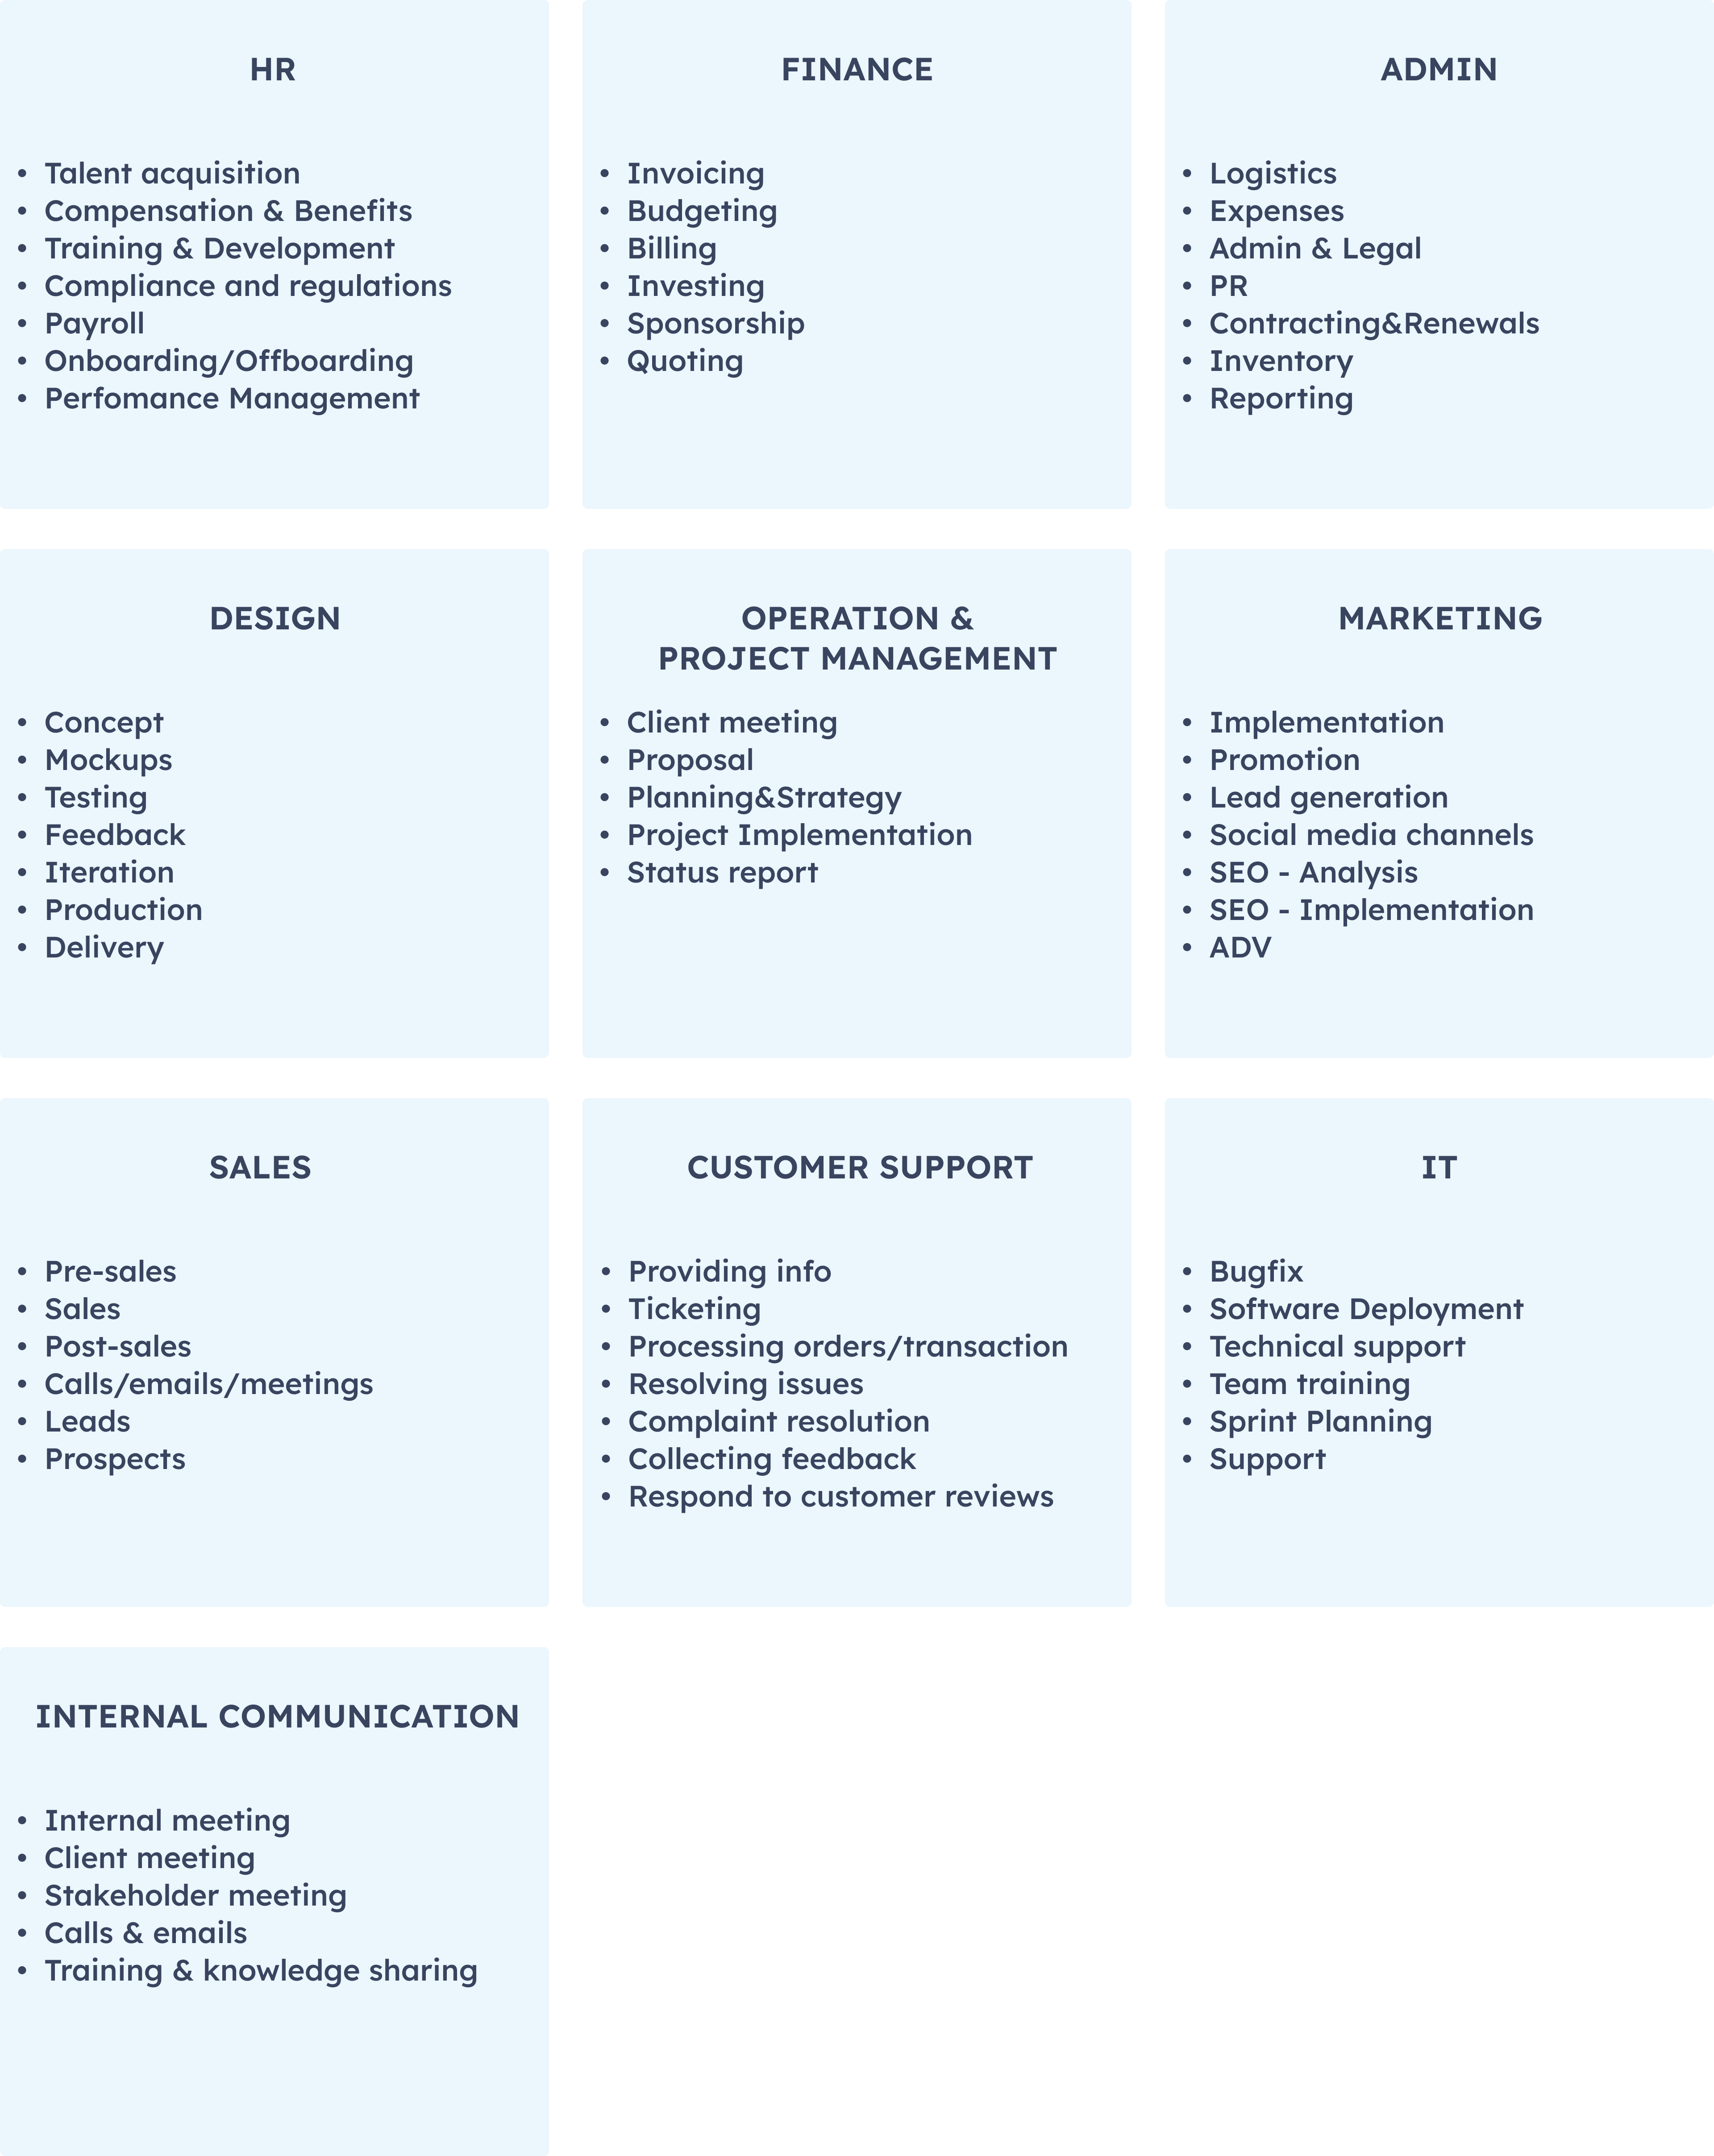
Here is a practical example of how each department could use the phases. Please take this as a source of inspiration and mold it to fit your company’s workflow.

What if you need to classify time with multiple labels? In Timeneye, you can assign Tags to your time entries. The tags are labels that you use to further categorize your time.
Tags are grouped in tag lists for order and reporting purposes.
Examples of tags related to the tag list called “Marketing” can be: “Online Promotion,” “Paid Promotion,” “Offline Events,” …
Examples of HR/administration-related tags include “Remote Work” and “In-Office Work.”
For a more extensive read on this subject, check out our guide on How to set up Timeneye based on your company's needs.
Roles and permissions in Timeneye
In Timeneye, you can set up different levels of permission and roles for your team members.
The permission level is the hierarchy of users in the whole workspace.
The role is assigned to a specific user for a specific project or group.
Permission levels in Timeneye:
-
Owner
-
Admin
-
Member
Roles in Timeneye:
-
Project Manager (PM)
-
Group Manager (GM)
Roles in Timeneye Responsibilities Owner The owner is the top level of permission in a Timeneye workspace. He/She has access to all the functions and views available, including managing the payment and subscription and deleting the whole workspace. Admin The admin has all the owner functions except managing the payment and subscription and deleting the workspace. Group Manager (GM) Group Managers can create projects, perform management functions, and run reports but only for the groups they manage. Project Manager (PM) Project Managers can perform management functions and run reports only for their active projects.
Member Members can track time and edit his/her personal settings and user integration. They can also be given roles for specific projects or groups.
Now that you have a better understanding of the hierarchy structure in Timeneye, we encourage you to take a moment to think about how to replicate your company’s architecture in your Timeneye workspace.
For example, the stakeholders could be Owners, Admin, or Project managers, and they will manage early adopters within their team as Group managers or simple users.
This way, you will have a heterogeneous group of people with different roles and permissions levels with whom you can test Timeneye in all its functionalities and troubleshoot potential problems.
In Phase 2, we will see how to onboard them.
How to manage clients
Timeneye offers you all the tools to deliver within time and budget, manage your clients’ portfolios and build healthy, successful professional relationships.
The Clients section gives you a complete overview of the total and billable time spent on your clients and related projects, phase categories, billable hours, and team members.
If you are a client-based business, we would like to encourage you to read about how to assign a project to a client.
In terms of permissions, only Admin and Owners can create Clients.
Best practices for a healthy time-tracking culture:
-
Give a good example: don’t forget to track your time, too!
-
Make sure your employees understand the value and importance of time tracking;
-
Don’t spy! Tracking your employees' every move is pointless from a productivity point of view, and it will only breed hostility and resentment. Stick to tracking the fundamental KPIs;
-
Allow for independence and accountability.
Next: Phase 2 - Overview
