In Lucen Track, the section named Clients gives you a complete overview of the total and billable time spent on your clients and related projects, phase categories, billable hours, and team members.
Visibility on Clients
In terms of permissions, the creation of Clients is limited to Admin and Owners. However, only Owners have access to view the internal costs associated with clients.
Regular team members are unable to access the Clients section.
How to create a new Client
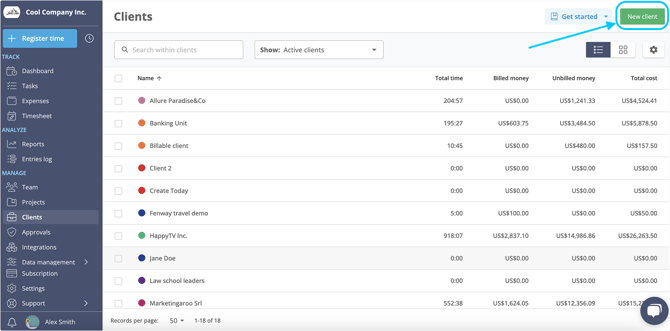
To create your first Client, you need to go to the Clients section on theblue sidebar menu.-png-1.png?width=670&height=326&name=client%20section%20new%20(1)-png-1.png)
Click on the New Client button at the top right corner.
Type the client’s name in the text box, then select a color to make it recognizable.
Now you should see the New Client's name added to the Clients list. If you want to add more information to this table, simply click on the gear icon and choose the columns you wish to include.
By clicking on the Client's case that you've just created, Lucen Track will provide you with an Overview of that specific Client. Please note that there is currently no data available, as you haven't started tracking time for this Client yet.
To track a client's time, you need to associate it with a Project first.
Associate a Client with a New Project:
Inside the Client details page are two tabs: Overview and Projects. Move to the second one, called Projects.
Press the + New Project button and fill in the form with all the project's details. As you will notice, the Client section has already been filled.
Once the new project has been created, it will be listed in the Projects tab.
You can add as many projects as you like.
Important note: the same client can be associated with multiple projects, but each project can only have one client.
Now, if you open the Register Time, you will find your brand new project and be able to track time on it.
You cannot directly track time on a Client since it must always be associated with a project.
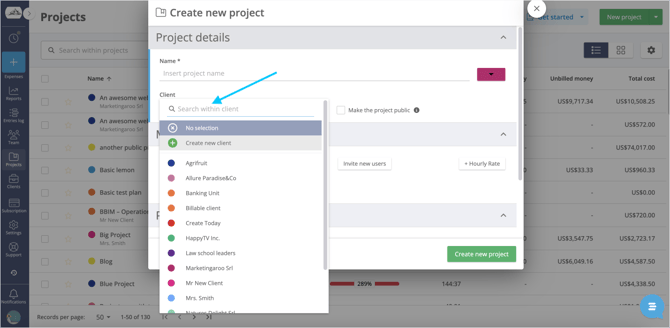
Another way to associate a Client to a New Project is from the Projects page, on the sidebar menu: press Create new project, fill in the name of your project, and then, in the Client section, use the dropdown menu to select your newly created Client.
Once you have filled in all the project details, click Create new project.
Congratulations! You are now ready to begin tracking time on the project linked to your New Client. This way, valuable data will also appear on its overview page.
Associate a Client with an existing Project
To link a project to your client, go to the Projects page on the sidebar and locate the project you want. Click on it and you will be taken to the Overview page. From there, click on the Edit button at the top right corner.
On this page, you will find all the project details. In the Additional Info section, you can choose the client's name from the dropdown menu.
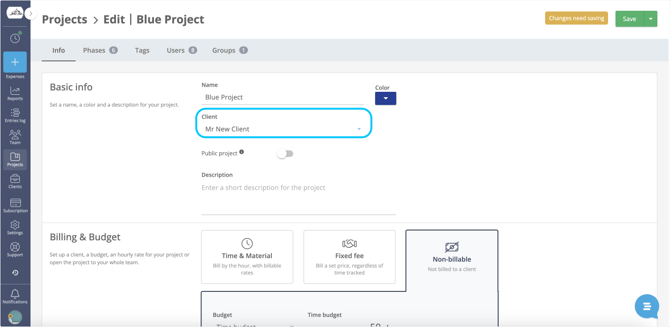
Don't forget to save all the changes by clicking on the Save button at the top right corner.
You can assign clients to any project type: Non-billable, Time&Material, or Fixed fee projects as well:
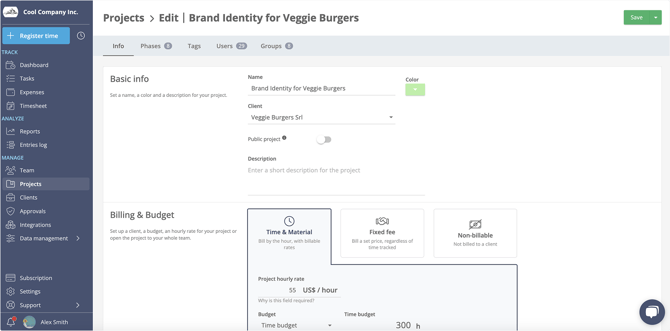
.png?width=670&height=329&name=fixed%20fee%20project%20client%20(2).png)
Great! Now, on the Project Status page, you will notice that under the project title, there will be a second line displaying the client's name.
Archiving a client
🌟 This feature is included in the STARTER Plan and up
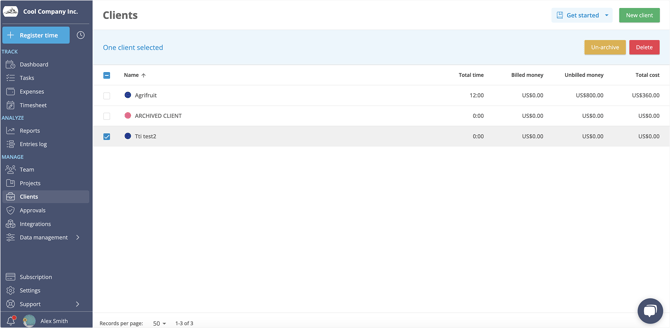
To easily manage your clients, you can now archive those that you no longer need by simply selecting the checkbox next to their name. If you ever need to bring a client back, just filter for "deactivated members" and reactivate them with ease.
.png?width=670&height=337&name=archive%20client%20(1).png)
Deleting a Client
PLEASE NOTE: deleting a client is a permanent operation and cannot be undone. When a client is deleted, all the entries linked to that client will be unlinked. For this reason, we always recommend archiving clients instead.
Before a client can be deleted, it must first be archived following the procedure described above. After that:
- In Projects section, use the filter on the top bar to select the archive projects;
- Select the project you want to delete
- Click the red Delete button and confirm.
Clients report
Reporting is an invaluable tool, especially for client-based agencies, as it provides a comprehensive overview of the time spent working for a client (or multiple clients) within a specific period.
One option is to generate a report on a specific client directly from their detail page by clicking on the green Report button. This will take you to the reporting section, where you can access all the relevant data for that particular project.
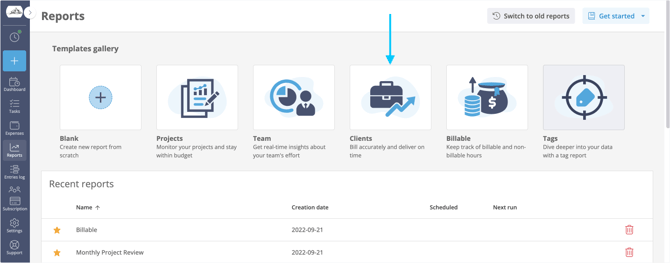
Alternatively, you can run a report on multiple clients to effectively track your company's profitability. Simply go to the reports section and select the client's report template. Our reports are designed with widgets to offer maximum flexibility for users to extract and review the desired dataset.
Our widgets come in three different layouts: area charts, pie charts, and tables. If you opt for infographic widgets like area charts and pie charts, you can choose three different metrics: Time, Cost, Revenue.
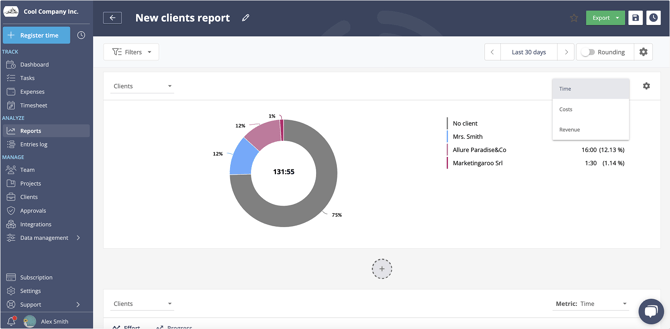
For table widgets, you can customize the content visibility by clicking on the gear icon and selecting the desired information, such as billing status and costs.

All reports can be exported to CSV or PDF formats, allowing you to maintain a record of your timesheets or share them with your employees or clients.
Filtering your Projects by Client when tracking time
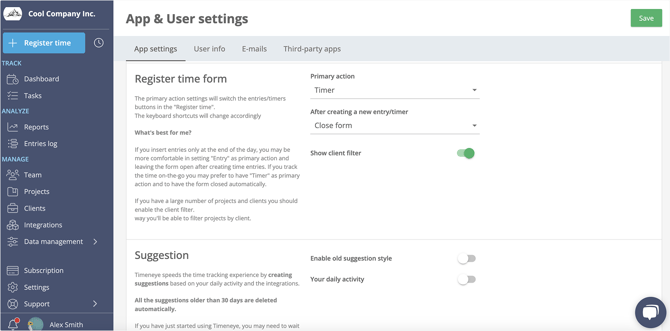
You can customize the Registert time dialog so that it display an option to pre-filter your projects by client, before selecting them to track time. This will make it easier to sort out projects when tracking time, especially those teams with a big client and project portfolio!.
1) Go to Personal settings;
2) In App settings, look for Register time form;
3) Turn on the Show client filter option.